


|
|
 |
 |
|||
|
Convert MacPort to Native Mac App Summary: MacPorts provides an excellent way of importing useful Linux apps into the macOS environment. However, the resulting apps are different from their native Mac counterparts - they live in a different set of folders and they must be started from a command line prompt vs double clicking an icon in the /Applications folder. This post lays out a process that allows successfully installed MacPorts apps to be run in the same way as native Mac apps. Objectives: (gnumeric used as an example app - could be any app of interest) There is a .app program in the /Applications folder for the MacPorts version of gnumeric. That program can be double clicked and it will first run X11, then gnumeric. That program can alternatively be started by drag and drop of a gnumeric spreadsheet onto the gnumeric app. The gnumeric app in the /Applications folder has the traditional gnumeric icon, per the below:  Prerequisites: Can start a command line (Terminal) session. Can type "startx &" into that session and xorg-server-legacy starts up. Can type "gnumeric &" into that session and gnumeric starts up and runs under xorg-server-legacy's X11. Steps: From your Applications folder, start Automator (my Sorbet runs Automator 2.0.4 - all screen shots are of this version). In the Automator window Search box at the top left, type "shell". This will leave you with one choice in the next pane: Run Shell Script. 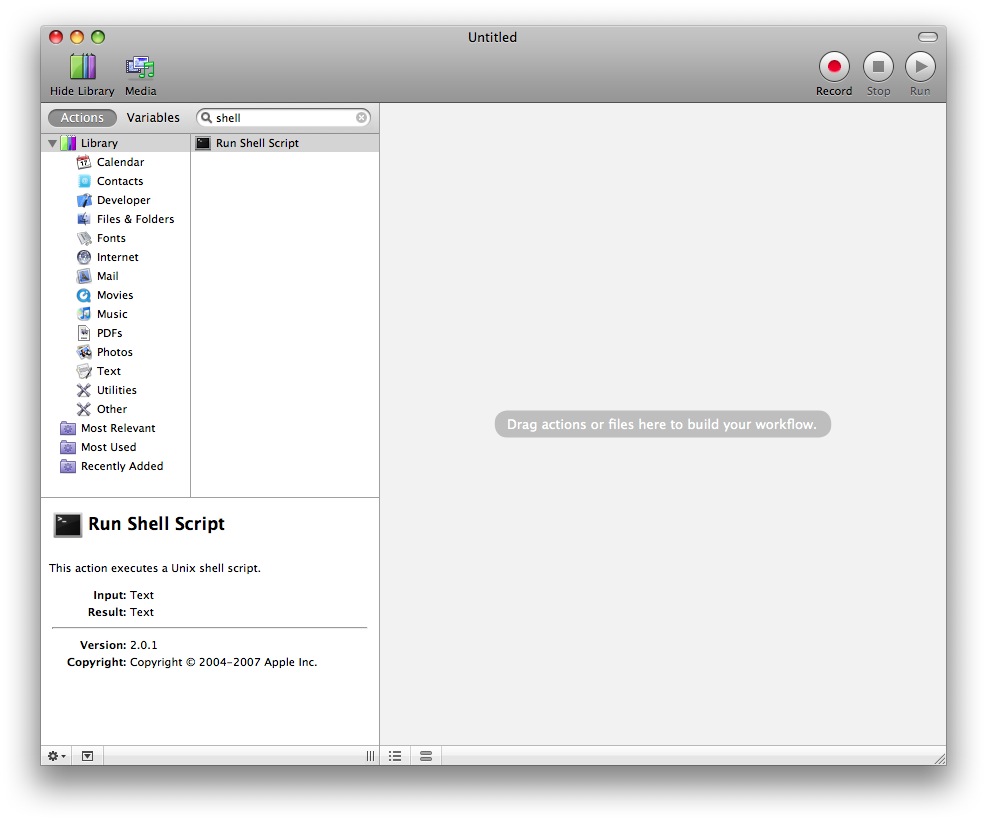 Double click it and a script window will open in the right hand pane. Change the "Shell" drop down to whatever shell is (a) on your machine and (b) you are comfortable with (I chose zsh). Change the "Pass input" drop box on the upper right to "as arguments". Enter the single line "/opt/local/bin/gnumeric $1" into the script area. 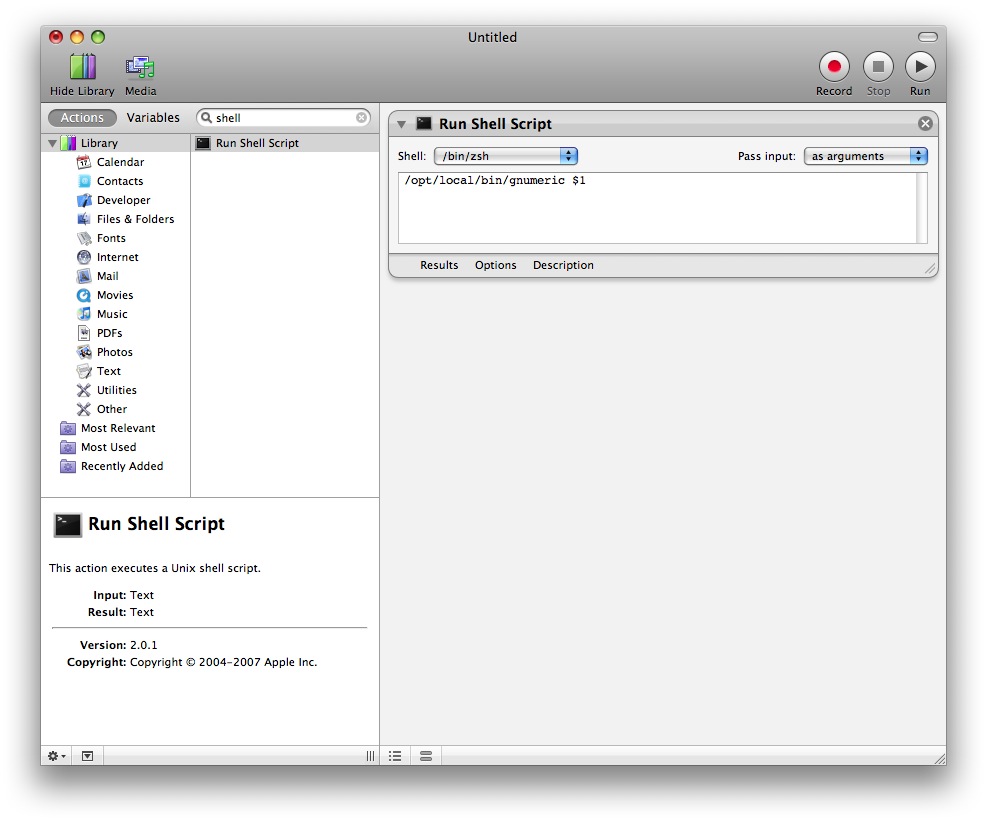 From the File menu, click "Save As" and name the file "gnumeric". Don't save yet! Change the "File Format" drop down to "Application". Select "Save". 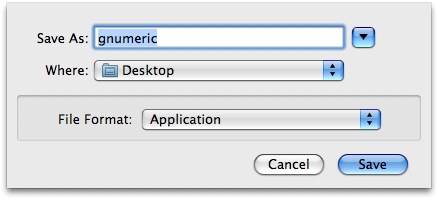 You now have on your desktop a gnumeric.app file that can be double clicked to run gnumeric You can also drag and drop onto it and it will run gnumeric and open the dropped file BUT... the gnumeric.app file you have does not show the gnumeric icon; instead it shows the Automator icon. Lets make this better - lets get this new gnumeric app to present the gnumeric icon. Get a gnumeric.icns file (details on how to do that are provided below). Right click your gnumeric.app file and select "Get Info". Drag and drop your gnumeric.icns file onto the small automator icon in the upper left of the Info window The Automator icon will be updated to the gnumeric icon. Close the Get Info window. Drag your gnumeric.app file, now sporting the gnumeric icon, into your /Applications folder. Drag gnumeric.app into your Dock if you wish. All Done! Creating a gnumeric.icns File: Icon files don't grow on trees - you can find many of them in libraries, but others you have to create for yourself. Here, we create one for ourselves: Start up your favorite browser and type "gnumeric" into the search field On the returned page, select "Images" You should see a page of gnumeric-related images not unlike the below: 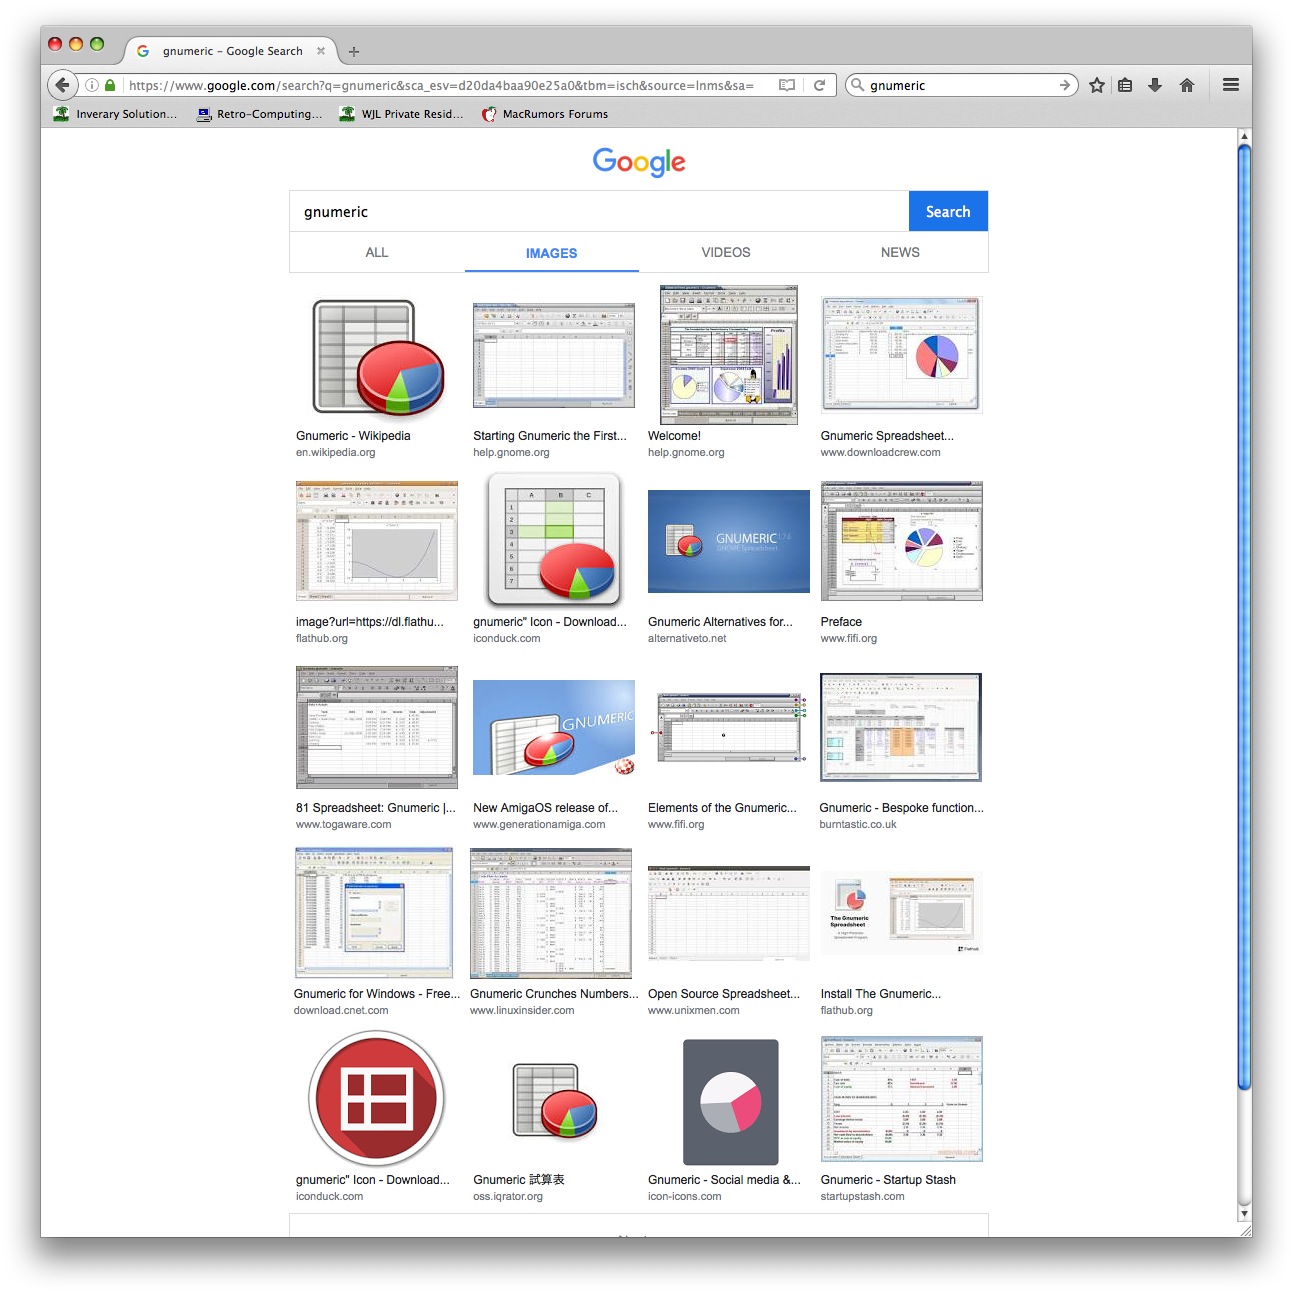 RIGHT click the top left image (the one that is the gnumeric icon!) and select Save As. Save it as gnumeric.jpg (or an extension to match whatever the file type is). In this case, we have saved it as a JPG. This is not optimal for an icon - it has a white background. Ideally, we want the background to be transparent. This is not necessary, but makes a nicer icon. This can be done in Photoshop, also in GIMP and also, I suspect, in Graphic Converter. In this case, I used Photoshop CS3. Open the gnumeric.jpg file in CS3. Select the Magic Eraser tool. Click anywhere in the white areas. All white will be changed to transparent. Select File, Save As, and save the result out as a PNG file, "gnumeric.png" in this case Drag and Drop gnumeric.png (or gnumeric.jpg) onto Iconverter 0.9.x. In the Iconverter window, select an output directory using the "Choose" button and click the "Use File Contents" checkbox. Now click the Extract button on the lower left. A gnumeric icon with a transparent background should now appear in your chosen output directory. You now have the needed gnumeric.icsn file! [End of "Creating a gnumeric.icns File" steps] BTW, you can repeat this process for ANY image you can find on the web and turn it into an icon! |
|
|
|